Step 1: FABRIC WASH
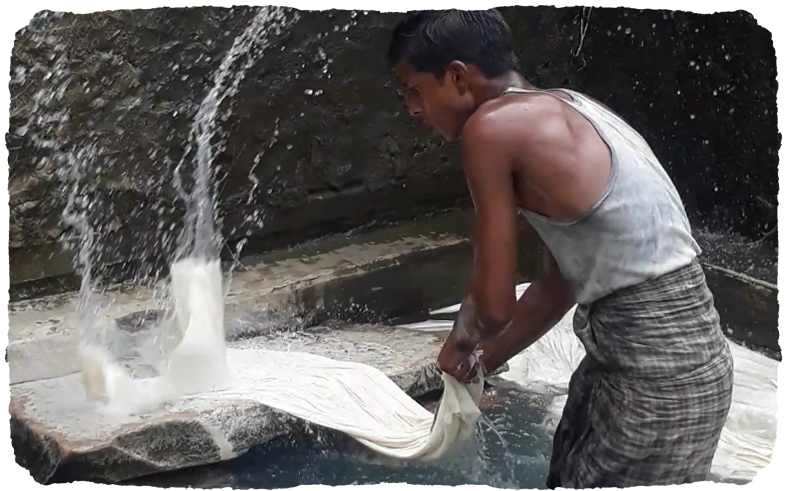
The fabric to be printed is washed free of starch and dust from the fabric. This process involves the fabric being soaked in water for a day and for another two days in a mixture of castor oil & water. It is then bundled and kept soaking in the solution for another 24 hours.
The fabric is then washed in clear water for two continuous days to remove all traces of the castor oil. The fabric is now ready for dyeing & printing to start
Step 2: BLOCK PRINT

If dyeing is required as in the case of saris, where borders or the body is tied and dyed, it is done before printing. The fabric is stretched over the printing table and fastened with small pins (in the case of saris the pallu is printed first then the border).
The printing starts form left to right. The color is evened out in the tray with a wedge of wood and the block dipped into the outline color (usually black or a dark color). When the block is applied to the fabric, it is slammed hard with the fist on the back of the handle so that a good impression may register.
A point to the block serves as a guide for the repeat impression so that the whole effect is continuous and not disjointed. The outline printer is usually an expert because he is the one who leads the process. If it is a multiple color design the second printer dips his block in color again using the point or guide for a perfect registration to fill in the color. Skill is necessary for good printing since the colors need to dovetail into the design to make it a composite whole. A single color design can be executed faster, a double color takes more time and multiple color design would mean additional labor and more color consumption
The printers often use a unique process of discharge printing to get the white or contrast coloured portions of the design.The design in created on a wooden block and then this area is printed with a ‘daboo’ paste. This paste is made with a mixture of:

Step 3: INDIGO DYEING

The indigo dye pit at Pipar dates back 30 years. Pits at other locations date back to the dyers grandfather and have been in unbroken use for over 30 years.
Indigo is created by soaking the leaves of the plant in pits which often age back generations. This unique color development enhances itself over these long periods.
The fabric is dipped in the dye. If printing is required, then it is again dipped in indigo after printing. A total of three separate dips are normal in this cold water dye process.
The indigo dye is so natural that these dyers even eat with their dye stained hands. The above paste is applied on the fabric and let to dry for a minimum of one day. This secures this area and prevents the dyes from penetrating these portions of the fabrics.
Post initial dyeing, these areas appear as white after the washing process. If required as white and it is left as such, and if not, then the fabric is over dyed again giving these areas the required color.